Instructions for using the oscilloscope are the easiest to understand
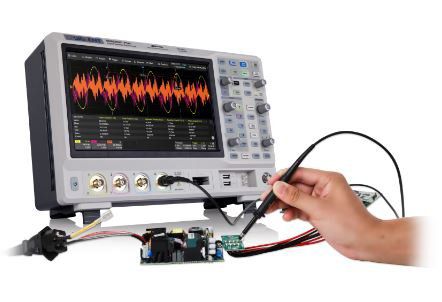
An oscilloscope is an indispensable measurement tool for a professional electronics technician. In this article, we will present some of the most basic operations on how to use an oscilloscope in electronic measurement. First of all, we must have an overview of the oscilloscope from its appearance to its uses in electronic repair or design.
Contents
General information about oscilloscopes:
Before learning how to use an oscilloscope correctly, you should understand the general characteristics of this device. This will help you understand more about the features and structure of the machine, thereby making it easier to use.

An oscilloscope, also known as an oscilloscope, is a device used to measure voltage and pulse fluctuations over time. It displays current fluctuations through a graphical display, with the Y axis representing voltage level, the X axis representing time, and the Z axis representing light intensity.
Thanks to the functions that the oscilloscope provides, it is widely used in many different fields. From assembling electronic devices and repairing telecommunications problems, to medicine and education. In medicine, oscilloscopes can measure brain waves, supporting medical research and development more conveniently.
Uses and functions of the oscilloscope:

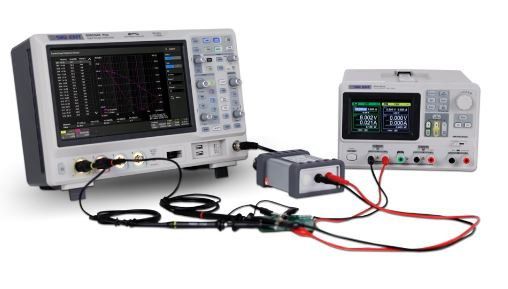
The main use of an oscilloscope is to display on the screen the changes of electrical signals over time. With today's popular oscilloscopes, at least it allows the user to simultaneously observe two electrical signals at the same time (2-channel type). For professional electronic designers, it is sometimes necessary to observe up to 4 electrical signals at the same time (4-channel type). Most electronics technicians are familiar with multimeters in repair work. Those who are just starting out can refer to the article on how to use a multimeter here --> Instructions on how to use a multimeter
However, a multimeter cannot help us observe instantaneous changes in electrical signals. The numerical values displayed on the multimeter screen are only the average values or effective values. With an oscilloscope, the worker can observe the electrical signal at any time, and at the same time display the waveforms (voltage changes over time) on the screen. From observing the electrical signal, the worker will be able to analyze factors related to that signal such as frequency, voltage amplitude, peak voltage, effective voltage, period, and pulse width. ...
Through those parameters, the technician will conclude whether the signal is stable, whether the waveform is correct... to provide reasonable troubleshooting solutions.
Knobs, adjustment buttons and notes when using the oscilloscope:

To know how to use an oscilloscope professionally, you need to know the principles when using an oscilloscope:
- Most oscilloscopes only allow measuring low voltage signals (below 400V effective). Therefore, oscilloscopes are not suitable for measuring high-voltage signals. With some oscilloscopes connected to computers, the allowable input voltage amplitude is less than a few tens of volts. Please pay attention to the input voltage value before trying on the oscilloscope. Therefore, when measuring electrical voltage signals such as high voltage circuits, electric shocks, mosquito rackets, batons, electric guns... absolutely do not measured with an oscilloscope. If you want to measure, you must use specialized high-voltage measuring probes for oscilloscopes.
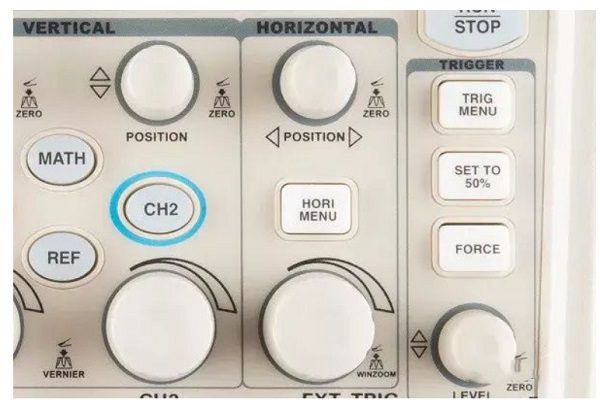
- On each channel of the oscilloscope there will be adjustment knobs: Volt/DIV or Scale (number of Volts on a vertical coordinate box), Position knob (Knob to adjust the position of that channel along the vertical axis) . The Volt/DIV or Scale knob adjusts the ratio of V/a division. This knob is like we choose the voltage signal scale. When measuring a signal with a large voltage amplitude, select a larger V/DIV number. The Position knob is the knob that aligns the position of that channel on the screen so that it is easiest to observe. These knobs are easy to identify because they are usually arranged in line with the probe jack in a vertical column. For example, to measure the voltage signal of a 6V battery, we will adjust it to 2V/DIV. When measuring with an oscilloscope, we will observe a ray parallel to the horizontal axis and 3 cells away from the horizontal axis. Because each division is 2V, the wave appears 3 cells away, which means 2x3=6V.
- On the right side there will be a knob to adjust the time/division ratio or also have the symbol Time/DIV or Scale. This knob will help us observe the signal over time. Depending on the frequency of the signal, we will turn this knob so that the waveform displayed on the screen is easiest to observe.
- The above knobs and adjustment buttons are the most important and commonly used buttons that all oscilloscopes must have. There are also a number of other function buttons such as the Measure button (measure parameters), Cursor button (move the cursor to measure the amplitude and change time of any waveform displayed on the screen).
Refer to the 4 types of oscilloscope models below:
Tektronix TBS1072C oscilloscope
Tektronix TBS1202C oscilloscope
Tektronix TBS1102C oscilloscope
Tektronix TBS1052C oscilloscope
Conclude:
This article demonstrates how to use an oscilloscope (using an oscilloscope) in the most basic way. Includes notes when using an oscilloscope, knobs and knobs to consider as well as electrical parameters that the oscilloscope can measure.
